Configuring An ODBC Data Source Using DataDirect Sequelink Server


This page describes how to create and configure an ODBC system data source for use with Stylus Studio®. This process consists of three main procedures:

  1. Creating an ODBC system data source
  2. Configuring the data source in the DataDirect SequeLink Manager
  3. Connecting Stylus Studio® to SequeLink Server

Each of these procedures is detailed below.

Before You Begin

Before starting this process, you must have installed DataDirect SequeLink SocketServer on the machine you wish to use as your data source. The DataDirect SequeLink Socket Server installation package.

Step 1: Create an ODBC System Data Source

The first step is to create an ODBC system data source. (This example uses a Microsoft Access database as the data source. The ODBC database you use for your data source might differ.) To create a new data source:
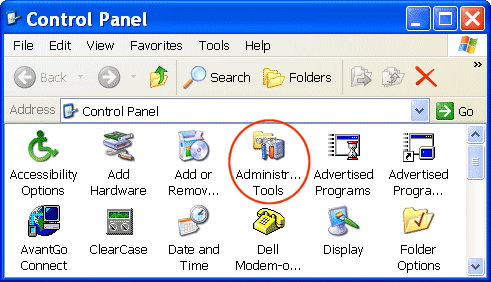
  1. Click Start > Settings > Control Panel on the Windows menu. The Control Panel window appears.


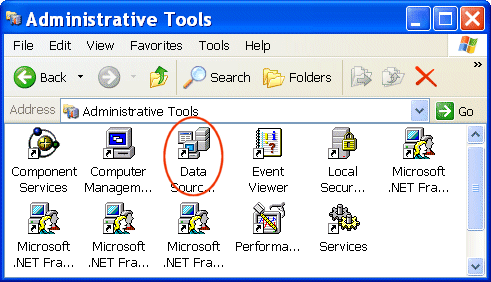
  2. Double-click Administrative Tools on the Control Panel window. The Administrative Tools window appears.


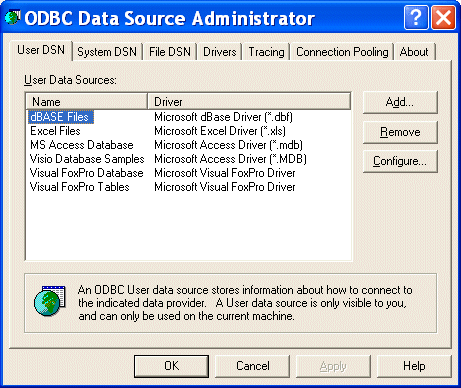
  3. Double-click Data Sources (ODBC) on the Administrative Tools window. The ODBC Data Source Administrator window appears.


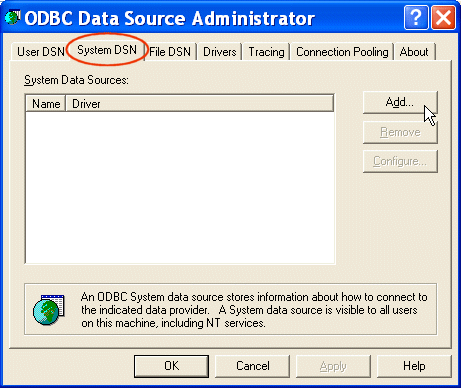
  4. Click the System DSN tab and click the Add button.


  5. The Create New Data Source window appears.
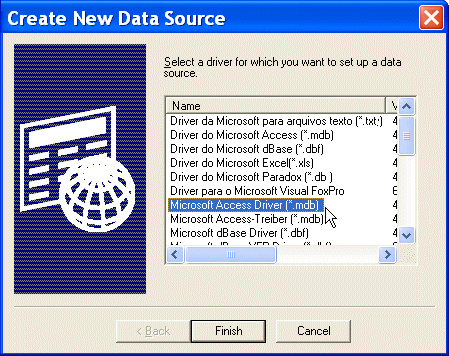


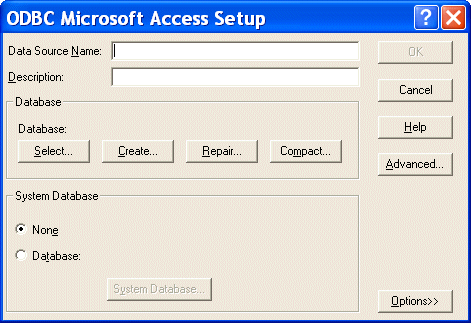
  6. Scroll down the list until you find the driver associated with the database for which you want to create a data source, and then click Finish. The ODBC Setup dialog box appears.


  7. Note that the information on this dialog box, including the dialog box title, varies based on the database driver you selected in the previous step. Here, we selected a Microsoft Access database driver, so the information displayed in the dialog box is specific to that database.
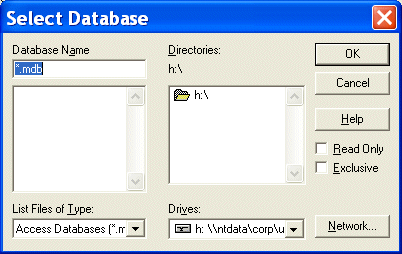
  8. Enter a name in the Data Source Name field. Click the Select button in the Database group box. The Select Database dialog box appears.


  9. Navigate until you find the database you want to use as the data source and click OK. You are returned to the ODBC Setup dialog box
  10. Click OK on the ODBC Setup dialog box.


Step 2: Configure the Data Source in the DataDirect SequeLink Server Manager

Once you have created a data source, you need to configure it using DataDirect SequeLink Manager, as described in this section.
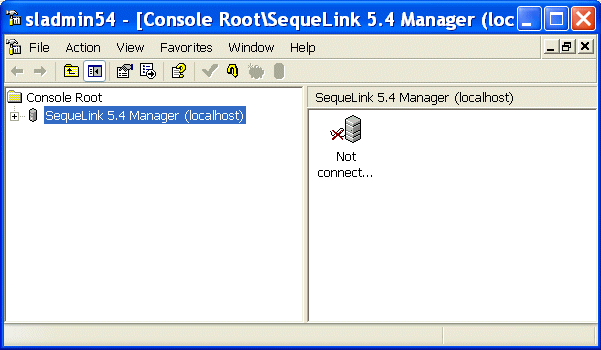
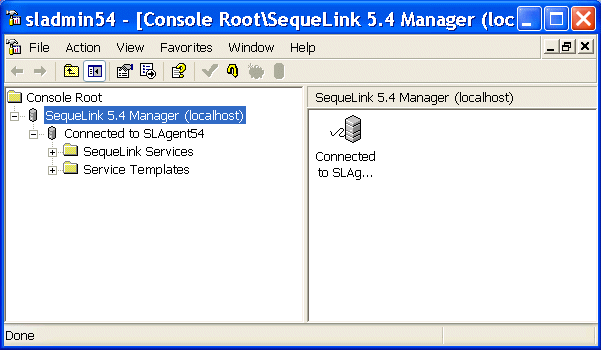
  1. Start the DataDirect SequeLink 5.4 Manager. For example, Start > Programs > DataDirect SequeLink 5.4 Service for ODBC Socket > SequeLink 5.4 Manager Snapin. The sladmin54 window appears.


  2. Expand the SequeLink 5.4 Manager (localhost) branch. This exposes another branch, Not connected to SLAgent54.
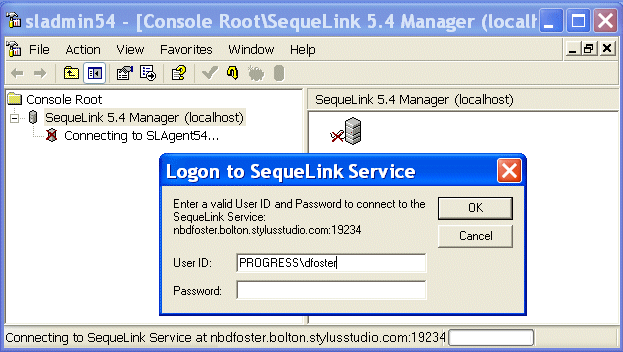
  3. Expand the Not connected to SLAgent54 branch. The Logon to SequeLink Service dialog box appears.


  4. Enter a user ID and password and click OK to connect to the SequeLink Service you created when you installed the DataDirect SequeLink SocketServer. (This will be the user ID and password for the machine on which you installed the DataDirect SequeLink SocketServer.)


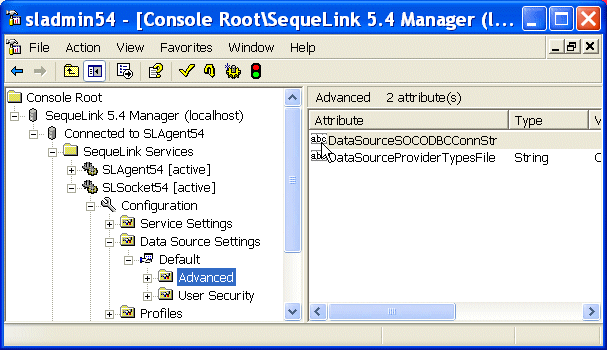
  5. Once you are connected, expand the SLSocket54 [active] branch as follows: Configuration > Data Source Settings > Default > Advanced. When you are done, your window should look like the following:


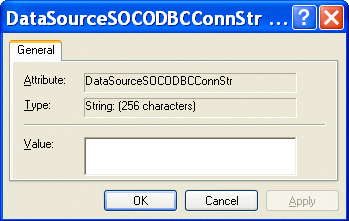
  6. Double-click DataSourceSOCODBCConnStr. The DataSourceSOCODBCConnStr dialog box appears.


  7. In the Value field, enter the following: DSN=data source name, where data source name is the name of the data source you created in step 6 in the previous procedure.
  8. Click OK, and close the sladmin54 window.

Step 3: Connect Stylus Studio® to SequeLink Server

After the data source has been configured using DataDirect SequeLink, it's ready for use in Stylus Studio®, as described in the following procedure.
  1. Start Stylus Studio®.
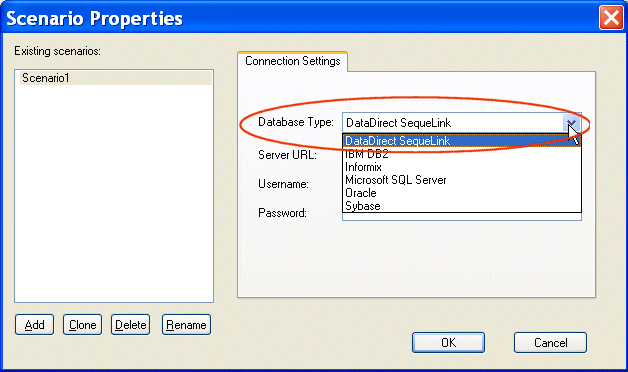
  2. Click File > New > DB to XML Data Source. The Scenario Properties dialog box appears.
  3. Select DataDirect Sequelink from the Database Type drop-down list. Stylus Studio® provides a default value for the Server URL field.


  4. In the Username and Password fields, use the values you used to connect to the SequeLink Service (step 4 in the previous procedure).
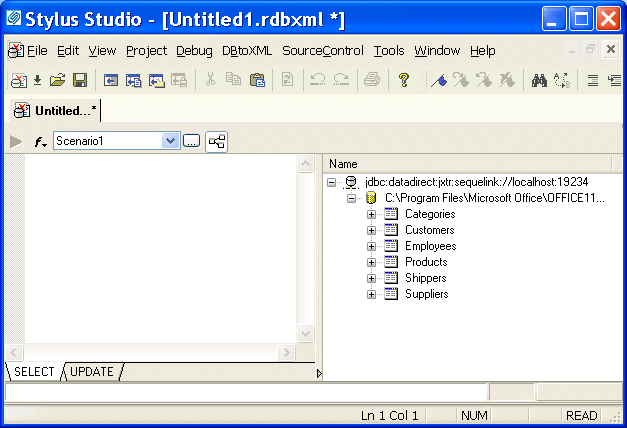
  5. Click OK. Stylus Studio® connects to the data source you created and configured in the previous procedures.


PURCHASE STYLUS STUDIO ONLINE TODAY!!

Purchasing Stylus Studio from our online shop is Easy, Secure and Value Priced!

Buy Stylus Studio Now

Learn XQuery in 10 Minutes!

Say goodbye to 10-minute abs, and say Hello to "Learn XQuery in Ten Minutes!", the world's fastest and easiest XQuery primer, now available for free!

Why Pay More for XML Tools?

With Stylus Studio® X16 XML Enterprise Suite, you get the most comprehensive XML tool suite at one incredibly low price. Value: it's just one of many reasons why smart XML developers are choosing Stylus Studio!

 
Free Stylus Studio XML Training: