|
|
Home >Online Product Documentation >Table of Contents >Updating the Schema of a Sample Document Updating the Schema of a Sample DocumentThis section provides instructions for updating the internal DTD for your-quotes.xml. When an XML document has an external DTD, you can view the external DTD in the Schema tab of the XML Editor, but you cannot edit it. To be able to edit an external DTD, you must open it in the DTD editor. When an XML document has an internal DTD, you can view and edit it in both the Schema tab and the Text tab of the XML editor. You should have already performed the steps in Updating the Text of a Sample Document. Each of the following topics contains instructions for editing the sample XML document. You should perform the steps in each topic before you move on to the next topic. After the first topic, some steps depend on actions you performed in a previous topic. This section includes the following topics: For more information, see Defining a DTD - Getting Started. Creating a Sample Schema
To create the schema of a sample XML document:
1. If it is not already open, open your-quotes.xml. See Opening a Sample XML Document if you need help with this step.
2. At the bottom of the XML editor window, click the Schema tab.
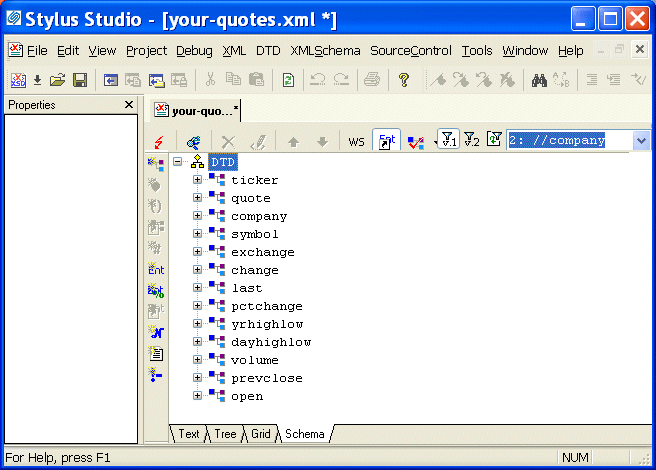
Stylus Studio displays the Schema tab, and opens the Properties window. The Schema tab displays a DTD tree, which is currently empty.
3. To create a schema for your-quotes.xml, select XML > Create Schema from XML Content from the Stylus Studio menu.
Stylus Studio displays the Create Schema or DTD dialog box. By default, Stylus Studio generates an internal DTD and inserts it in a DOCTYPE element at the beginning of the document. You can also use this dialog box to generate an external XML Schema or DTD.
4. Click Yes to instruct Stylus Studio to create a DTD based on the XML document content.
Stylus Studio displays a tree representation of the new, internal DTD. It also displays the Properties window. Defining a Sample ElementThis topic is part of a sequence. If your-quotes.xml is not open, see Opening a Sample XML Document. The sequence starts with Creating a Sample Schema.
To define a new element in the Schema view of the sample schema:
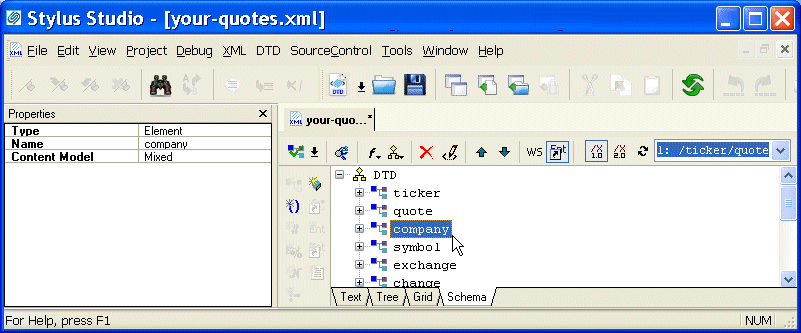
1. Click the company element in the Schema tab.
This selects the company element definition and displays the properties for the company element in the Properties window.
The Content Model property indicates the allowable contents for a company element. In this example, it is Mixed, which means that a company element can contain specified elements (as opposed to all elements defined in this DTD), attributes, and raw data.
2. Click the DTD node.
In the left tool bar, Stylus Studio activates only those buttons that are applicable to the DTD - you can add elements, entities, comments, and so on. But you cannot add an attribute definition, a reference to an element, or a #PCDATA node, for example.
3. In the left tool bar, click New Element Definition
4. Type location and press Enter. Stylus Studio displays the properties for the new location element in the Properties window.
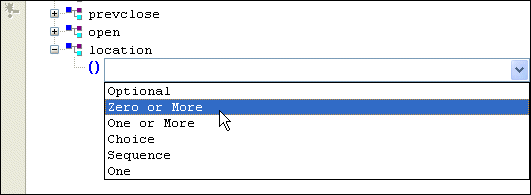
5. In the left tool bar, click New Modifier
6. Double-click Zero or More (or click once to select it and press Enter).
7. In the left tool bar, click Add #PCDATA Adding an Element Reference to a Sample SchemaThis topic is part of a sequence. If your-quotes.xml is not open, see Opening a Sample XML Document. The sequence starts with Creating a Sample Schema.
To update the definition of the quote element to include an optional location element:
1. In the Schema tab, expand the quote element.
2. Click its Sequence modifier.
3. In the left tool bar, click New Modifier
Stylus Studio displays an entry field for the new modifier at the end of the list of modifiers that already apply to the Sequence modifier. The entry field consists of a drop-down list of available values for the new modifier.
4. In the drop-down list, double-click Optional.
5. In the left tool bar, click New Reference to Element
6. Type location and press Enter.
7. To move the location element to be earlier in the sequence, click its Optional modifier.
8. In the XML editor top tool bar, click Move Up Defining an Entity in a Sample SchemaThis topic is part of a sequence. If your-quotes.xml is not open, see Opening a Sample XML Document. The sequence starts with Creating a Sample Schema.
To define an entity in the internal DTD for your-quotes.xml:
1. Click the DTD node.
2. In the left tool bar, click New Entity
At the end of the schema, Stylus Studio displays Ent and a entry field for the name of the new entity.
3. Type TCBCC for the name of the entity and press Enter.
In the Properties window, Stylus Studio displays the properties for the new entity.
4. In the Properties window, double-click the Value field.
5. Type The Country's Best Computer Company and press Enter.
Exploring Other Features in a Sample SchemaThis topic is part of a sequence. If your-quotes.xml is not open, see Opening a Sample XML Document. The sequence starts with Creating a Sample Schema.
To toggle white space or validate your document:
1. Click Toggle Display of White Space
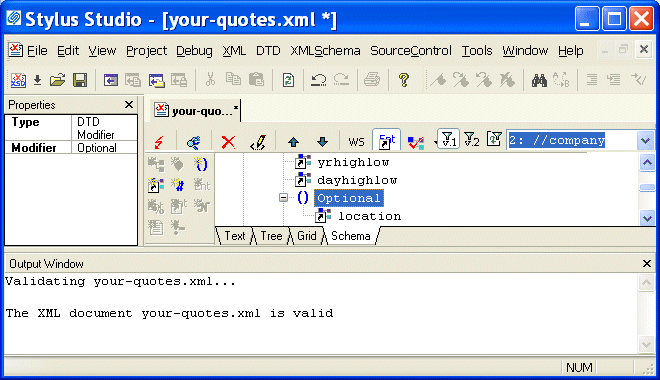
2. Click Validate Document
Stylus Studio displays a message in the Output window that indicates that the document is valid.
|
XML PRODUCTIVITY THROUGH INNOVATION ™

 Cart
Cart


