Cart
Cart|
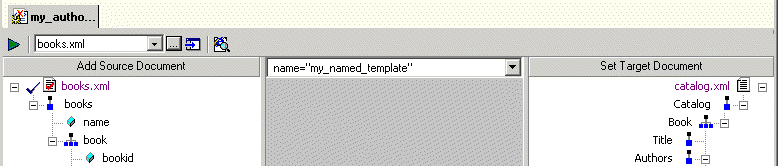
Home > Online Product Documentation > Table of Contents > Creating and Working with Templates Creating and Working with TemplatesA stylesheet can contain more than one template. This section describes Stylus Studio's features for creating and working with named and matched templates in XSLT mapper. What Happens When You Create a TemplateWhen you create a template, Stylus Studio switches the XSLT mapper to the new template. The attributes identifying the template you are currently viewing are displayed in the template drop-down list at the top of the mapper canvas.
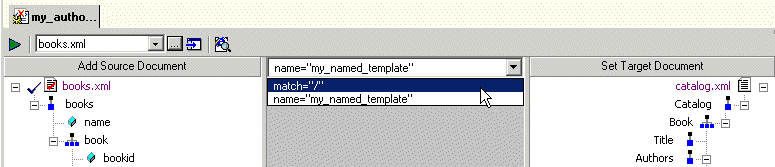
You can change the template view at any time, by selecting the template from the drop-down list, as shown in Figure 235.
How to Create a Named or Matched TemplateTo create a named or matched template:
1. Right-click the XSLT mapper canvas.
2. Select
Create Template > Named Template or
> Matched Template from the shortcut menu.
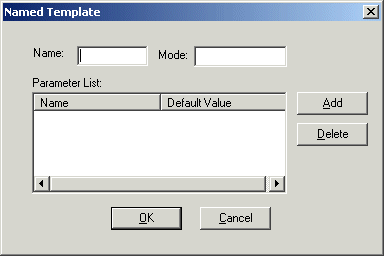
Stylus Studio displays the Named Template (or Matched Template) dialog box. (The Named Template dialog box is shown in Figure 236.)
3. Enter a name and, optionally, a mode.
4. Optionally, create one or more parameters:
a. Click the
Add button.
The Name column becomes editable.
b. Type a parameter name and press Enter.
The Default Value field becomes editable.
c. Type a default value.
d. If you want to define another parameter, click
ADD; otherwise, go to
step 5.
5. Click
OK to finish creating the template.
|
XML PRODUCTIVITY THROUGH INNOVATION ™