Cart
Cart
|
Home >Online Product Documentation >Table of Contents >Creating a New Sample Stylesheet Creating a New Sample StylesheetTo create a stylesheet to use in this tutorial, follow these instructions:
1. From the Stylus Studio menu bar, select File>New>XSLT Stylesheet.
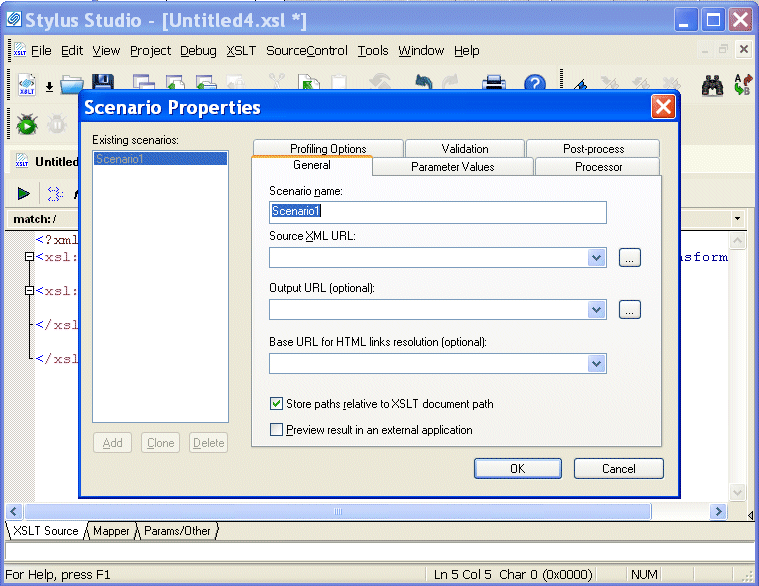
Stylus Studio displays a new untitled stylesheet and the Scenario Properties dialog box, and selects the text in the Scenario Name field.
2. In the Scenario Properties dialog box, in the Scenario Name field, type DynamicBookstoreScenario.
3. Click Browse Stylus Studio displays the Open dialog box.
4. Navigate to the Stylus Studio examples\query directory.
5. Double-click bookstore.xml. This is the XML document that the new stylesheet will operate on.
6. In the Scenario Properties dialog box, click OK.
This creates a scenario with the name
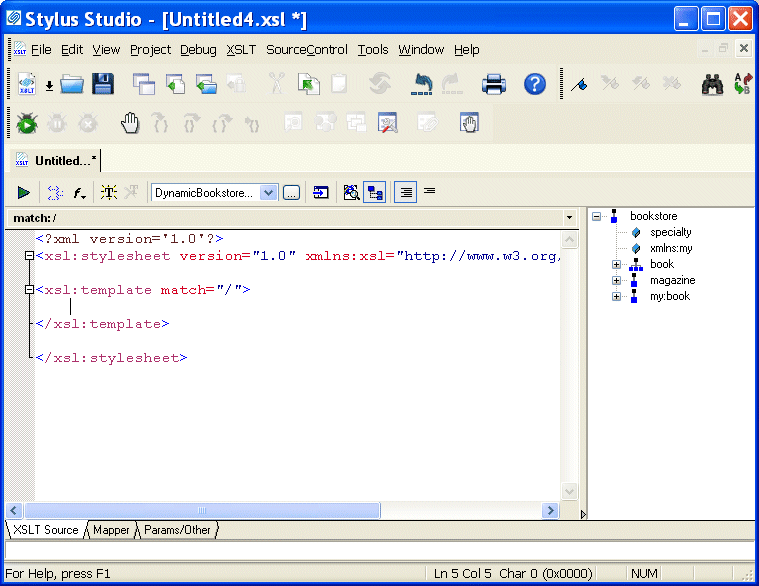
Stylus Studio displays the new stylesheet in the XSLT editor. A tree representation of the The default stylesheet that Stylus Studio creates contains one template, which matches the root node.
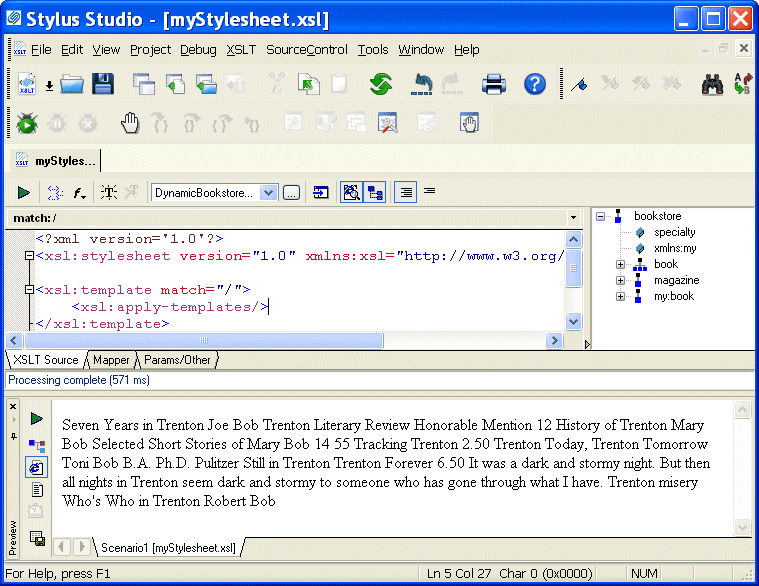
7. In the XSLT editor tool bar, click Preview Result Stylus Studio displays the Save As dialog box so you can save the XSLT you are composing.
8. In the URL: field, type myStylesheet.xsl and click Save.
Stylus Studio applies the new stylesheet to
9. In the XSLT editor pane, click in the empty line that follows <xsl:template match="/"> .
10. Type <x, which displays the Sense:X completion list.
11. In the completion list, scroll down and click xsl:apply-templates.
12. Type />.
13. In the XSLT editor tool bar, click Preview Result Stylus Studio displays the Save As dialog box.
14. Enter a name for the file and click Save.
This time, the Preview window contains all text in To create a Web page, you need to add HTML markup that displays the information the way you want. To make it easier to do that, you need to understand how the text is already being copied to the result document. |
XML PRODUCTIVITY THROUGH INNOVATION ™