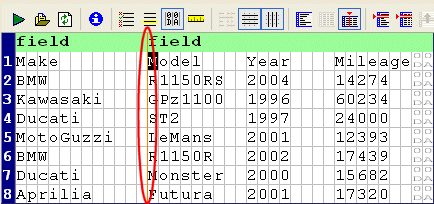
Defining Fields

You can define fields in any region in a fixed-width input file, as shown in Figure 174. Once you have defined a field, you can change its size by simply dragging it to any column in the grid.

Figure 174. Line Identifying a Field in a Fixed-Width Input File

Each field you define is treated as a separate element in the XML output by the custom XML conversion definition. The input file shown in Figure 174, for example, would result in XML with two <field> elements, one consisting of the make of motorcycle, and one consisting of the model, year, and mileage. You can use the field feature to exercise control over the XML - defining separate fields for make, model, year, and mileage, for example.

Consider the following input file:

Make        Model    Year    Mileage 
BMW         R1150RS  2004    14274   
Kawasaki    GPz1100  1996    60234   
Ducati      ST2      1997    24000   
MotoGuzzi   LeMans   2001    12393   
BMW         R1150R   2002    17439   
Ducati      Monster  2000    15682   
Aprilia     Futura   2001    17320  

By default, each row is considered to have a single field, containing Make, Model, Year, and Mileage, resulting in XML output like this:

<?xml version="1.0" encoding="utf-8"?> 
<root> 
	<row> 
		<field>Make        Model    Year    Mileage 
  
</field> 
	</row> 
	<row> 
		<field>BMW         R1150RS  2004    14274   
  
</field> 
	</row> 
... 

If you specify fields for Model, Year, and Mileage, the XML output by the custom XML conversion definition looks like this:

<?xml version="1.0" encoding="utf-8"?> 
<root> 
	<row> 
		<field>Make</field> 
		<field>Model</field> 
		<field>Year</field> 
		<field>Mileage 
  
</field> 
	</row> 
	<row> 
		<field>BMW</field> 
		<field>R1150RS</field> 
		<field>2004</field> 
		<field>14274   
  
</field> 
	</row> 
... 

Neither approach is always correct, but this feature gives you the ability to define the type of XML output that is appropriate for your use.

Tip


Of course, in this example, the next logical step might be to use the first row (Make, Model, Year, and Mileage) as the field names as described in Naming Fields.

To define a field:
1. Place the cursor in the document pane on the character with which you want to start the new field.
2. Click the Begin Field in This Column ( ) button. This action is also accessible from the CustomXMLConversion menu and the shortcut menu in the Custom XML Conversions Editor.

Stylus Studio displays a thin orange line that identifies the start of the newly defined field.

To remove a field:

The procedure for removing a field is the same as the procedure for defining one - place the cursor on any character adjacent to the field line you want to remove and click the Begin Field in This Column ( ) button.

Creating Notes for Fields

Stylus Studio allows you to create notes on individual fields. These notes are for reference purposes only; they are not output in the XML.

To create notes for a field:
1. Click the entry field for the Notes property.

Tip


The Notes property is in the Field Element Name > Source Data Type tree in the Properties window. These properties appear only for rows for which a match pattern exists. See Pattern Matching for more information on this topic.

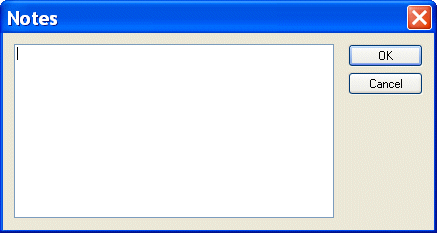
The Notes dialog box appears.

Figure 175. Notes Dialog Box

2. Type the notes you want to associate with the field and click the OK button.

Tip


If a field has a note defined for it, it is displayed in a tooltip which appears when you hover the mouse pointer over the field in the Custom XML Conversions Editor.

 
Free Stylus Studio XML Training: